Injury prevention isn’t just about avoiding the worst-case scenario. It’s about staying consistent—so you can keep training, keep improving, and stop losing weeks to avoidable setbacks. The good news is you don’t need a complicated system. You need a simple checklist you can repeat before every workout and game day. Use the steps below to build a routine that protects your body, your energy, and (yes) your teeth—especially if you play contact sports.
Injury prevention keeps you training, not rehabbing
Injury prevention is how you protect consistency and progress. When you treat it like a routine (not a reaction), you spend more time training and less time starting over. That matters whether you lift weights, run, play team sports, or just want to feel better week to week.
Think of it as a few repeatable habits you do before and after sessions. This checklist focuses on warm-ups, hydration and fuel, smart gear choices, and recovery—including “special cases” like returning from a strain or training while wearing orthodontic devices. If you have a history of injuries or medical conditions, it’s always smart to check in with a qualified professional before changing your routine.
Warm up with purpose before you raise intensity
A short warm-up prepares joints, muscles, and focus fast. You don’t need a 20-minute production, just enough to increase your temperature, loosen the areas you’ll use, and rehearse the movements you’re about to do. The goal is simple: move better before you move hard.
Here’s a quick template you can reuse in almost any sport or workout. If you want a deeper dive on mobility habits, including stretching for flexibility and injury prevention, build it into your weekly plan, not just on the days you feel “tight.”
The 5-minute warm-up
- 1 minute: easy movement
Walk briskly, jog lightly, jump rope slowly, or do an easy bike spin. Start slow. - 2 minutes: dynamic mobility
Pick 2–3 drills: leg swings, hip circles, arm circles, ankle rocks, or torso rotations. Stay controlled. - 2 minutes: sport pattern rehearsal
Do what your session requires, just at a lower intensity. Two short accelerations, three controlled jumps, or 10 bodyweight squats can be enough.
Common warm-up mistakes
- Going from “cold” to full speed in the first minute
- Skipping warm-ups after a long day (when your body is stiffest)
- Doing long static stretches before you’re warm (save those for after)
Hydration and fuel reduce fatigue-driven mistakes
When you’re under-fueled, form slips and injuries happen. It’s not always dramatic—you just get slower, your footwork gets lazy, you stop bracing well, and small mistakes pile up. The simplest fix is to make hydration and food part of your plan instead of an afterthought.
Keep it practical: your goal isn’t a perfect nutrition spreadsheet. Your goal is to show up with enough energy to move well, and to recover so you can train again.
A simple game-day hydration plan
- Before: Sip water throughout the day (don’t “chug and hope”)
- During: Keep a bottle nearby and drink between sets, drills, or breaks
- After: Refill what you used—especially after sweaty sessions
Food basics that travel well
Aim for something familiar that gives you steady energy. Don’t try new foods right before a big game or hard workout.
Easy snack ideas (pick what works for you):
- Banana + yogurt
- Peanut butter on toast
- Turkey sandwich
- Trail mix (if your stomach tolerates it)
- Oatmeal + fruit
- Protein smoothie (simple ingredients)
If you have any medical needs that affect hydration or diet, take the safe route and ask a clinician or qualified coach for guidance.
Gear check: shoes, surfaces, and mouthguards
The right gear prevents small problems from becoming big ones. Most “random” tweaks start with something simple: worn-out shoes, slipping on a slick surface, or using the wrong protective equipment for the sport you’re playing. A 30-second scan before a session can save you weeks later.
Start with your shoes and your environment. Check the tread, support, and stability. If your shoes are worn down, uneven, or uncomfortable, that’s a sign to replace them. Also, pay attention to surfaces—wet courts, uneven fields, and cluttered training areas change how your body absorbs force.
Now add oral protection to the checklist. If there’s a chance of collisions, falls, elbows, or flying equipment, a mouthguard is a smart default. The ADA guidance on athletic mouthguards is clear: properly fitted mouthguards help reduce the risk and severity of oral injuries.
Mouthguard types (quick guide)
- Stock: pre-formed; often bulky and less secure
- Boil-and-bite: molded at home; better fit than stock for many people
- Custom-fit: made with professional input; typically the most tailored fit
Care checklist
Good mouthguard habits matter, too. Research and prevention guidance support using protective gear consistently—see the CDC evidence on mouthguards in contact sports for an evidence-based overview.
- Rinse after use
- Let it dry fully before storing
- Keep it in a ventilated case
- Don’t leave it in a hot car or direct sun
- Replace it if it’s cracked, warped, or no longer fits well
Recovery and special cases: aligners, braces, and returns
Recovery routines and special cases keep small issues small. Two situations deserve extra planning: returning from an injury and training while using orthodontic devices (like braces, retainers, or clear aligners). The goal in both cases is the same—reduce surprises and protect your mouth and body during higher-risk sessions.
If you wear aligners and you’re deciding what to do for sport, start with the simplest question: is this a contact or collision-risk session? If it is, plan your mouthguard strategy in advance. This guide on when to use a mouthguard if you wear clear aligners breaks down practical scenarios (training days vs contact games) so you’re not guessing in the parking lot. It’s also worth reading orthodontist guidance on mouthguards for braces and retainers so you understand what “good fit” really means during treatment.
If you wear clear aligners
- Decide whether the session has contact/collision risk
- Keep your aligner case with you (don’t wrap aligners in a napkin)
- Have a hygiene plan (water rinse, brushing when possible)
- Ask your orthodontist about fit and options for your situation
Now add recovery. The basics aren’t flashy, but they work: cool down, do a little mobility work, and sleep enough to bounce back. If you want simple habits to make this easier day to day, use daily fitness tips that build safer training habits and pick one small change per week.
Post-session routine (simple and repeatable):
- 3–5 minutes of easy movement to cool down
- Light stretching or mobility (focus on what you used)
- Aim for 7–9 hours of sleep when you can
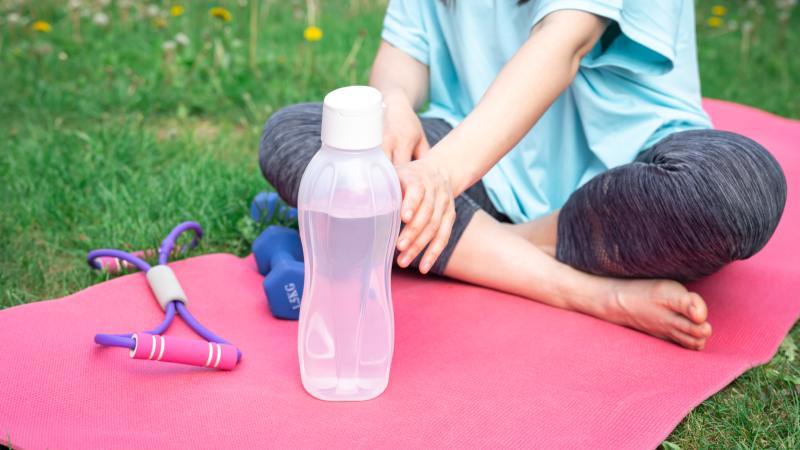
Quick pack list for next time:
- Water bottle
- Simple snack
- Mouthguard + case
- Aligner case (and a small hygiene kit if needed)
Conclusion
The best injury prevention plan is the one you actually repeat. Warm up with purpose, hydrate and fuel so fatigue doesn’t wreck your form, and do a quick gear scan before you start. If you play contact sports, treat mouthguards like standard equipment—especially if you’re in orthodontic treatment. Then recover like it matters, because it does.